Are you wondering how to store film recipes custom settings on your Fujifilm camera? In this guide, I’ll walk you through the steps to save your favorite custom film recipes and show you some of the best vintage film simulation recipes I currently use on my Fujifilm X-T4 with the X-Trans IV sensor.
With Fujifilm cameras, it’s easy to access and switch between both original film simulations and your custom recipes. Simply press the Q button to bring up the quick menu. As mentioned before, Fujifilm cameras allow you to store up to 7 custom film simulation recipe settings, making it easy to switch styles while shooting.
When it comes to white balance (WB), it’s best to assign a unique WB for each recipe. For example, the CineStill 800T recipe uses Fluorescent Light 3. I keep this WB exclusive to that recipe to avoid conflicts. This is because white balance adjustments are shared across all custom recipes, meaning if you change the WB shift, it will affect all recipes that use the same WB type.
Another example is the Kodak Portra 400 film recipe, popular among portrait photographers. It uses Daylight White Balance, so it’s best to dedicate that WB only to this recipe to keep colors consistent.
As for which film recipes custom settings to use, you can either try popular Fujifilm film simulation recipes from film recipe websites or create your unique style. Many Fujifilm photographers experiment with custom looks to achieve vintage or cinematic tones. If you’re interested in something creative, check out my tips on shooting portraits with cinematic effects for more inspiration.
Why Use Fujifilm Film Recipes?
Fujifilm cameras are known for their built-in film simulations like Classic Chrome, Classic Negative, and Provia, which replicate the look of Fujifilm’s traditional film stocks. A film recipe is a custom combination of settings—such as white balance, highlight/shadow tone, noise reduction, and grain effect—that creates a unique film-like style straight out of the camera.
The biggest benefit? You get beautiful SOOC JPEGs (Straight Out of Camera) without hours of post-processing. Whether you prefer the nostalgic warmth of Kodak Portra 400, the cinematic tones of CineStill 800T, or high-contrast black-and-white styles, these recipes let you store the look and switch with a single click.
How Many Custom Settings Can Fujifilm Cameras Store?
Most Fujifilm cameras, including models with X-Trans IV (X-T4, X-E4, XPro3) and X-Trans V sensors like the X-T5, X-E5 and X100VI, can store up to 7 custom film simulation recipe settings. Once saved, these recipes can be quickly accessed using the Q button or the shooting menu. However, some older Fujifilm cameras, such as the X-T20, X-E3, and X100F, do not save the white balance shift within the custom settings. This means you’ll need to manually adjust the WB shift each time you switch between film recipes.
For photographers using these older models, a simple workaround is to keep a quick reference sheet or note on your phone with the exact white balance shifts for each recipe. For example, if you frequently switch between CineStill 800T (which uses Fluorescent Light 3 with a specific shift) and Kodak Portra 400 (which uses Daylight with +4 Red and -5 Blue), having the shifts documented makes the process much faster. You can also store these WB values as presets in your notes app or camera menu shortcuts for quicker access.
Example of Custom Slot Setup
You could organize your custom slots (C1–C7) like this:
- Custom 1: Kodak Portra 400 (for portraits)
- Custom 2: CineStill 800T (for night shots)
- Custom 3: FujiColor C200 (for everyday street photos)
- Custom 4: High-contrast B&W recipe …and so on. This makes it easy to switch styles without tweaking settings every time.
Setting Up The Custom Setting for Film Simulation Recipes
Here’s how to store a custom film recipe setting on the Fujifilm cameras with film simulation custom settings:
Step 1 - Choose your favorite film recipes from custom film simulation resources or websites
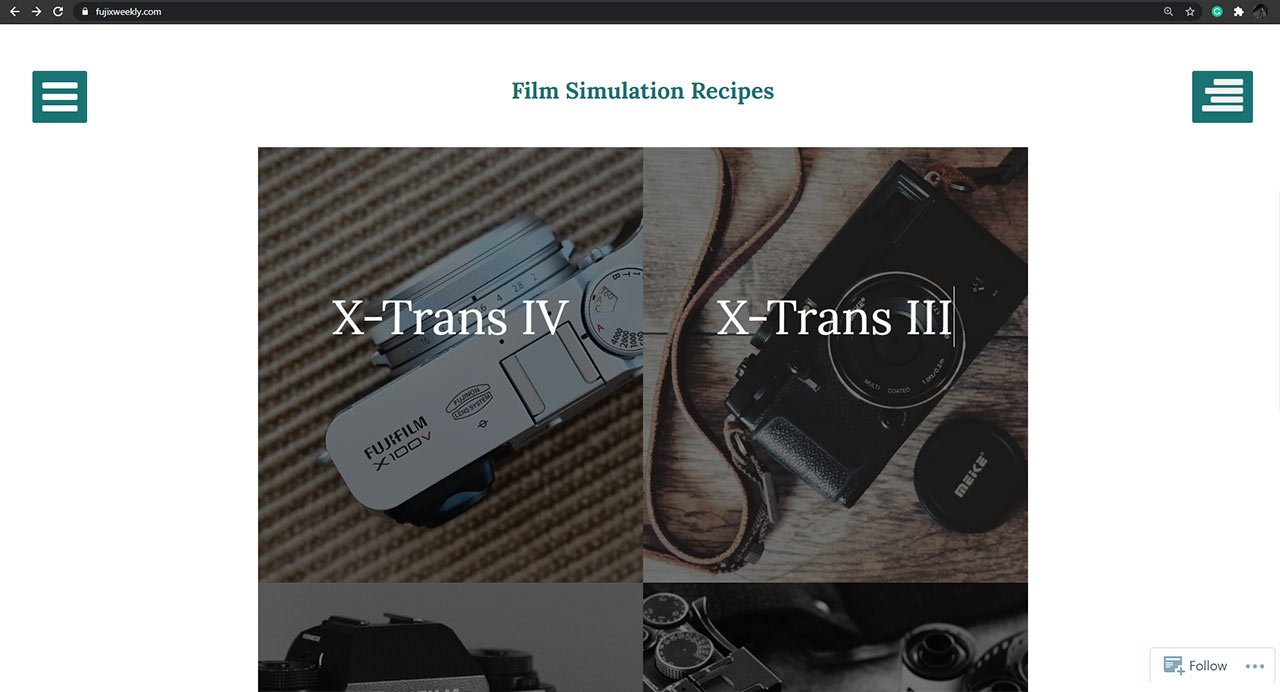
Select a recipe from popular film recipe websites or IvanYolo’s Fujifilm recipes for your camera sensor. Each recipe usually includes settings for ISO, noise reduction, film simulation, highlight and shadow tones, sharpness, color, dynamic range, and white balance.
Step 2 - Choose The Right Shooting Mode
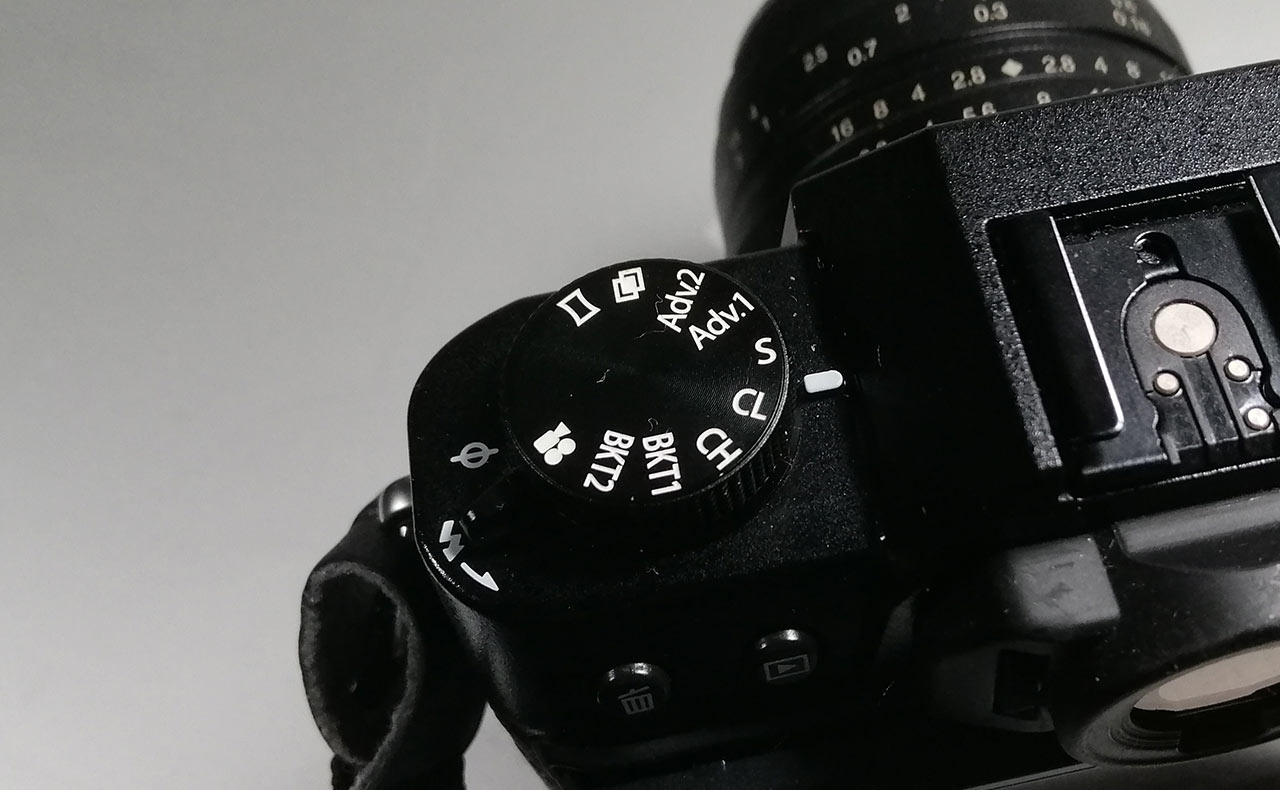
Before you program a film recipe, make sure your Fujifilm camera is set to the standard Shooting Mode (Still). If your camera is in other modes, such as video, panorama, or advanced scene modes, the Image Quality (IQ) settings will be greyed out and unavailable. This is because film recipes are designed for still photography and rely on the full range of image adjustments that Fujifilm provides in still mode.
Switching to Still mode (S) ensures you have access to all necessary parameters like dynamic range, highlight/shadow tone, color adjustments, grain effects, and white balance shift. These settings are essential for recreating the specific look of a film recipe.
If you frequently switch between stills and video, it’s a good idea to double-check the mode dial before trying to load or save custom settings. A glance at the mode dial or camera display can save you from the frustration of wondering why certain options aren’t visible.
Step 3 - Create A New Custom Setting
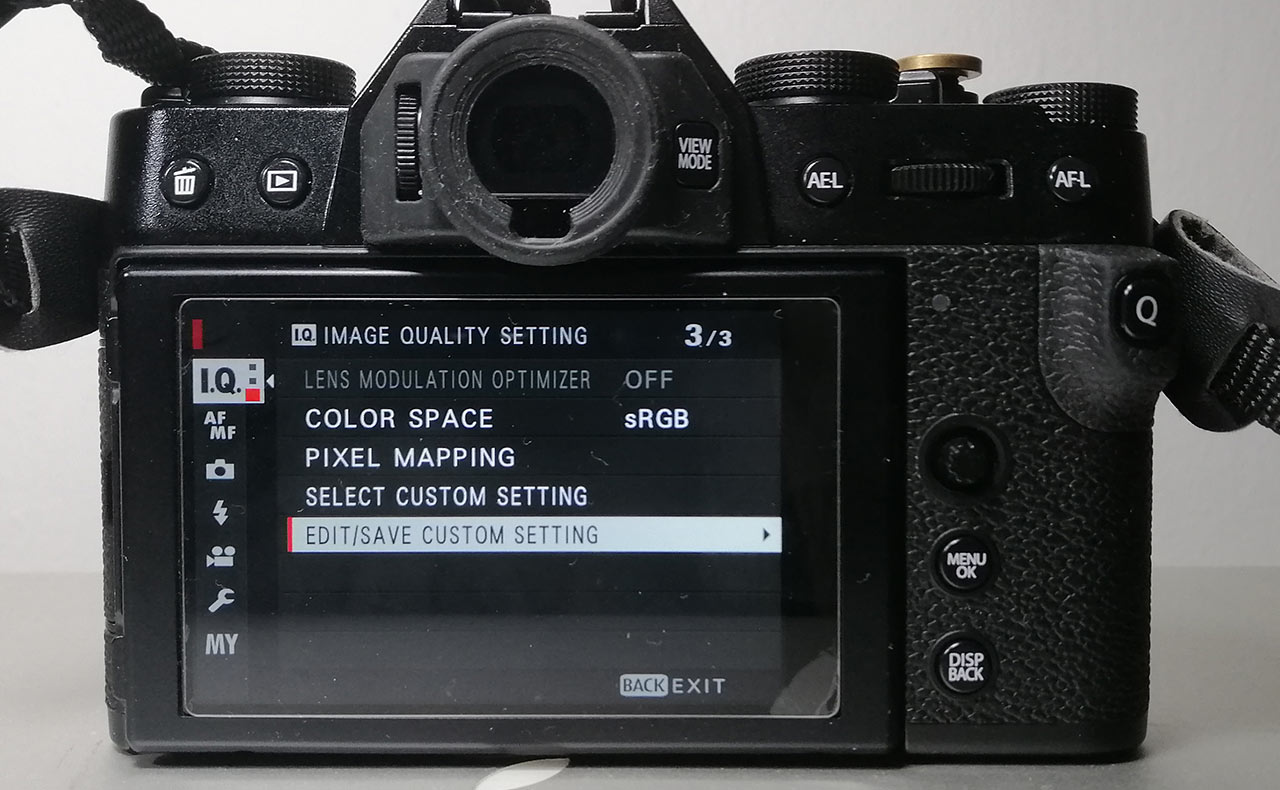
To save your chosen film recipe, you’ll need to create a new custom setting in your Fujifilm camera. Start by pressing the Menu button. Navigate to the I.Q. (Image Quality Setting) tab, usually found on the first page of the shooting menu. Scroll down until you see the option Edit/Save Custom Setting, and select it.
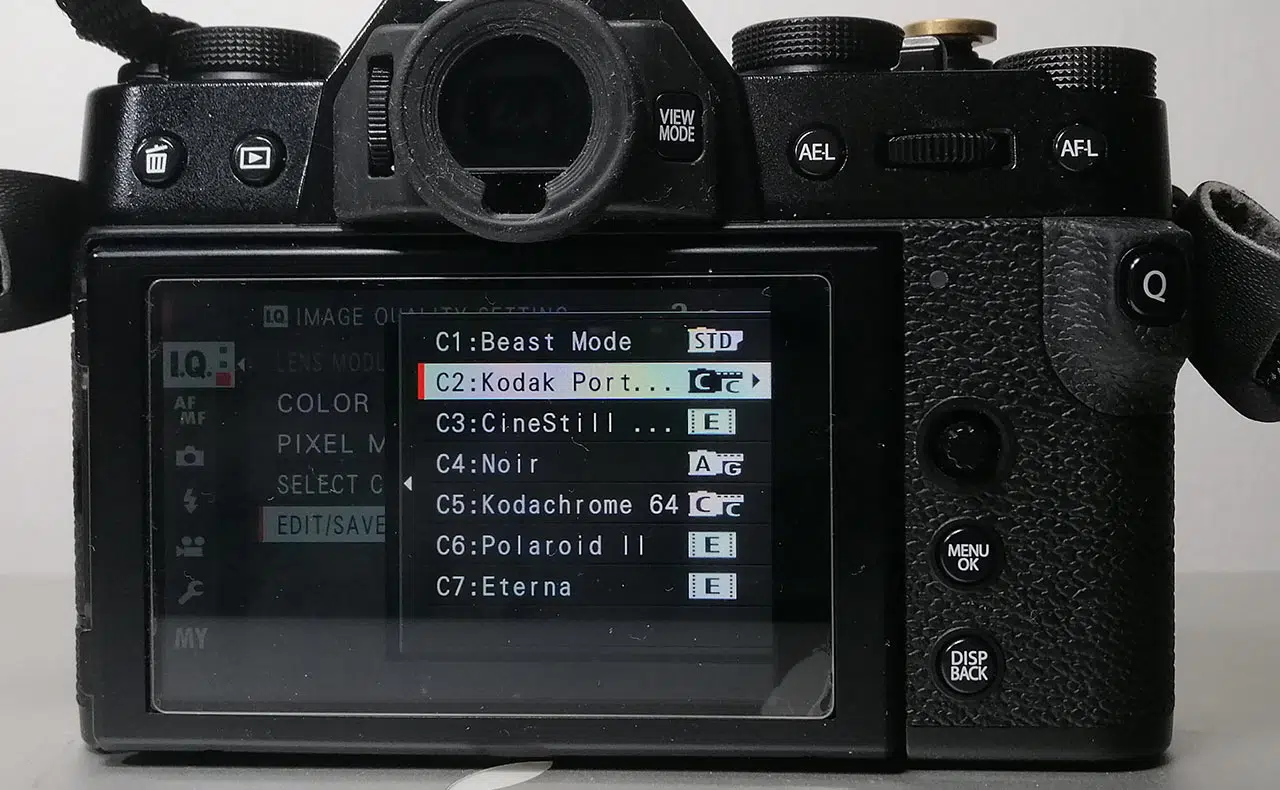
Inside the Edit/Save Custom Setting menu, you’ll find slots labeled C1 to C7 (or Custom 1 to Custom 7). Each slot corresponds to one recipe you can save. Select an empty slot (or overwrite an existing one) where you want to store the new film recipe.
Once you’ve chosen a slot, you can manually enter all the film recipe parameters—such as film simulation, dynamic range, highlight/shadow tone, color adjustments, noise reduction, grain effect, and white balance. If you’re using a recipe like Kodak Portra 400 or CineStill 800T, make sure to input each setting exactly as specified to achieve the intended film look.
Step 4 - Program The Recipe Custom Setting
Once you’ve chosen a slot (C1 to C7), it’s time to input the settings for your selected film recipe custom setting. Refer to the recipe details from trusted film recipe blogs or IvanYolo’s Fujifilm recipes, and carefully enter each parameter exactly as specified. These settings include film simulation, dynamic range, highlight and shadow tones, color, noise reduction, sharpness, grain effect, and white balance (including WB shift).
Tip: Even a small change—like adjusting the WB shift by one step—can noticeably alter the final look. So, if you want to replicate the film recipe accurately, double-check every value before saving.
Film Simulation: Classic Chrome
Dynamic Range: DR-Auto
Highlight: -1
Shadow: -1
Color: +2
Noise Reduction: -4
Sharpening: -2
Grain Effect: Strong
Color Chrome Effect: Strong
White Balance: Daylight, +4 Red & -5 Blue
ISO: Auto, up to ISO 6400
Exposure Compensation: +2/3 to +1 (typically)
Kodak Portra 400 Recipe by Fujixweekly
Step 5 - Name The Custom Setting

When naming your custom settings, use short and descriptive names so you can quickly identify them in the Q menu. For example, you can name them “PORTRA400”, “CINE800T”, or “GINZA80” for Ginza 1980. This helps avoid confusion when you have multiple recipes saved. Some photographers also use numbers (e.g., C1 – PORTRA, C2 – URBAN) for faster navigation.
Step 6 – Quick Access via Q Menu
Once you’ve saved your custom film recipes, you can quickly access them using the Q button on your Fujifilm camera. The Q menu allows you to toggle between all 7 custom settings (C1–C7) without digging through the full camera menu, making it fast and convenient to switch looks while shooting.
For example, you might have C1 set to Kodak Portra 400 for warm, natural portraits, and C2 set to CineStill 800T for cinematic night scenes. With a single press of the Q button, you can jump from a portrait-friendly film look to a moody street style without adjusting each parameter manually.
This organization saves time and helps you remember which recipes are where, especially during fast-paced shoots.
Tips for Managing Your Fujifilm Film Recipes
- Keep a list of your recipes. Write down the settings or store them in a note-taking app so you can quickly re-enter them if needed.
- Test your recipes in different lighting. Some recipes look better in overcast conditions, while others shine during golden hour.
- Use separate white balances. Avoid overlapping WB types across different recipes.
- Experiment with variations. Adjust highlight/shadow tones or grain effects to match your style.
Popular Film Recipes to Try
If you’re new to Fujifilm recipes, start with:
- Pacific Blue –A vivid recipe for travel and landscapes.
- Classic Cuban Negative – Vibrant yet natural colors, great for travel.
- Kodak Portra – A vintage film recipe inspired by Kodak Portra 400.
- Nomadic Mood – A travel recipe with a moody vibe.
You can find these recipes on film simulation community sites, blogs, and more on IvanYolo’s Fujifilm Recipes collection.
Conclusion
With film recipes and custom settings, your Fujifilm camera becomes a creative tool that can produce film-like results without heavy editing. Whether you want warm, nostalgic tones for portraits or punchy colors for street shots, you can store your favorite recipes and switch between them with just a few clicks.
Voila, and now you’re done. You have successfully programmed a film simulation recipe setting on your Fujifilm camera! So, what are your thoughts on the film recipes custom setting guide presented above? Please leave a comment below with your favorite film simulation recipe setting that you have saved in your camera. Guess what? You also might want to check out the new list of 7 best film recipes that are currently stored in my Fujifilm camera.
FAQs – Film Recipes Custom Setting
1. What is a Fujifilm film recipe?
A film recipe is a custom combination of camera settings—like white balance, highlight/shadow tone, color, and grain—that mimics the look of film stocks such as Kodak Portra or CineStill.
2. How many custom settings can I save?
Most Fujifilm cameras allow up to 7 film recipes (C1–C7) that can be quickly accessed through the Q menu.
3. Can I share my custom settings?
Yes. Many photographers share their film recipes online, film simulation community pages and you can also tweak shared recipes to match your style.
4. Do film recipes affect RAW files?
Film recipes mainly impact JPEGs (SOOC). RAW files will not permanently retain the film look but will display it as a preview in-camera.
5. What’s the difference between film simulations and film recipes?
Film simulations are built-in Fujifilm color profiles like Classic Chrome or Provia, while film recipes are customized settings based on these simulations to create a unique, film-like style.
6. Do I need to reset my custom settings when switching WB shifts?
Not necessarily. As long as each recipe uses a unique white balance type (e.g., Daylight vs. Fluorescent), you won’t have conflicts. But for older cameras that don’t store WB shifts, you’ll need to adjust WB manually each time.
7. Can I create my own Fujifilm film recipe?
Absolutely! Start by selecting a film simulation like Classic Chrome, then experiment with color, contrast, and WB shifts until you achieve the look you want. Many photographers develop a signature style this way.
8. What are the best film recipes for portraits and street photography?
For portraits, Kodak Portra 400 and Ginza 1980 are excellent choices. For street photography, Urban Scape and CineStill 800T offer striking tones, especially at night.


2 Responses
Hello! Thanks for the tips. Do film simulations not work in video mode?